Friday, 28 February 2014


Thursday, 27 February 2014
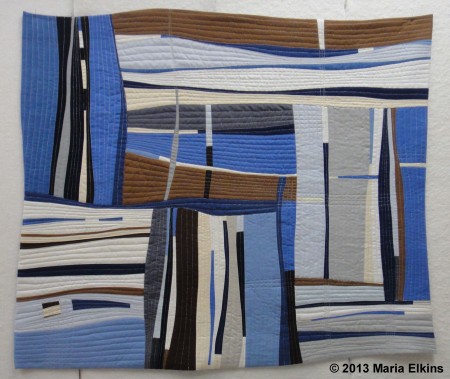
Graffiti I Pad case
Graffiti I Pad case
Cut your fabric to the Size you want. Remember it needs to wrap around the I Pad 2 times and have enough for a flap.
.jpg)
Cut some batting the same size as the fabric.
.jpg)
Stitch a straight line down the centre of the fabric. Then using the foot as a guide stitch lines next to the first line in the width you would like. Mine is a pressure foot wide.
.jpg)
Keep stitching until the fabric is covered.
.jpg)
Then trim the edges square.
.jpg)
Your fabric is now ready to make into a case.
.jpg)
Follow the instructions here of how to make the I Pod pouch.
.jpg)
A really cool Teen.boy/man pouch that they will want to take any where to show off to their mates.
.jpg)
Wednesday, 26 February 2014
.jpg)
.jpg)
.jpg)
.jpg)
.jpg)
Tuesday, 25 February 2014
Graffiti fabrics
I think fabrics and patterning for boys in NZ can be very negative. Negative images, words and pictures. I have created some fabric for an I pad case and a messenger bag. It is cool graffiti fabric with positive words.
Wet the fabric and paint over it with different colours then stamp, print and use stencils all over the fabric to create your own graffiti style fabric.
.jpg)
.jpg)
.jpg)
.jpg)
.jpg)
Wet the fabric and paint over it with different colours then stamp, print and use stencils all over the fabric to create your own graffiti style fabric.
Monday, 17 February 2014
I will post again on the 21st Feb
One of the draw back about living in the country were we are, is broadband is not guaranteed. We have to pay a lot of money for a small amounts of data and this month we have run out early. I will not be able to post again until the 21st of Feb when we be back on line.
Meanwhile I am being creative, settling kids in at school and quilting some unfinished work.
Meanwhile I am being creative, settling kids in at school and quilting some unfinished work.
Happy creating!!!!!
P.S. Go the black caps (my favourite team .......NZ cricket)
Thursday, 13 February 2014
Come and celebrate with me
We've made 50 followers!!
.jpg)
It may not sound like much but I've been blogging for 4 years and it
has taken quite a lot of work to get here.
Thank you all for following me and supporting my blog.
.jpg)
You are all awesome !!!!
That calls for a celebration. Would you join with me today and do these
10 things to celebrate. Find a friend to join us and have fun.
- Do one thing creative today
- Give something away to another person
- Laugh out loud
- Run through a sprinkler (warmer areas) Play in mud (cooler areas) Make a snowman (freezing areas)
- Sing your heart out. (The shower is my favourite place)
- Eat your favourite dessert. Yum!!
- Be still and just listen
- Be kind to someone
- Journal
- Do something crazy
I'll let you know in the
next couple of days what I did :)
Tuesday, 11 February 2014
Guide word art quilt
This year I have chosen the guide word
Accept
To direct my path this year.
To accept means to
Respect
Acquire
Gain
Get
Obtain
trust
agree
live with
welcome
Stand for
I decided made an art quilt to remind me daily of my word. A visual reminder really helps to keep the word in your head and to keep you focussed.
.jpg&container=blogger&gadget=a&rewriteMime=image%2F*)
The quilting
.jpg)
Free motion polka dots and topographical map
.jpg)
Free motion arches
.jpg)
Close up of stitching around the word
.jpg)
.jpg)
.jpg)
All finished
.jpg)
The finished art quilt top.
What do you think?
Saturday, 8 February 2014
Inspirational photography this week
Caves
The shapes, textures and contrasts in cave entries are amazing.
Be inspired
.jpg)


.jpg)
Thursday, 6 February 2014
Studio makeover: Beautiful labels
Last week I did a post called Goal setting with a twist which talks about setting a goal word for a year. The idea is to choose a word to guide through the year.
I have chosen the word accept.
To help me remember my word I decided to do what I do best to make an art quilt on my word. I have started my Word art quilt but I haven't managed to get it finished this week. I hope to have it done for you to see on Monday.
Today I have a great wee project for labelling storage containers in the studio.
Labels for storage
Equipment
- Clothing tags of any shape or size. I keep any tags I get from new clothing.
- White paint
- 3 different colours of acrylic paint. I've chosen green, yellow and blue.
- A metallic paint
- Gold braid/ribbon
- black pen
.jpg)
Find a tag from clothing brought from a store.
.jpg)
Remove the price stickers.
.jpg)
Paint both sides of the label with white paint.
.jpg)
When the first coat is dried paint a second coat of white paint over both sides of the tags.
.jpg)
Paint green, yellow and white paint onto the tag. Paint quickly and don't mix the colours together.
.jpg)
Print a stamp into the paint. The stamp will print into the wet paint and leave an impression. Dry.
.jpg)
Brush white paint onto a stamp and stamp the tags.
.jpg)
Print a small circle on the tags. Use the blue paint. An old thread reel works really well.
.jpg)
Print bubble wrap onto the tags with a pale blue paint
.jpg)
Stamp with the first stamp again with the yellow paint
.jpg)
Choose a contrasting stamp and stamp over the tags in green paint.
.jpg)
Apply metallic paint to the tags with a cotton bud. Take care only to use a little so it doesn't cover the colour already added to the tag.
.jpg)
The tags ready to write on.
.jpg)
.jpg)
Label the tag.
.jpg)
Add some gold braid/ribbon/ thread
.jpg)
Tie on to the box
.jpg)
A beautiful finished tag.
.jpg)
Or stick onto the box if there is no where to tie the label.
.jpg)
Don't throw away any left over paint. It can be used to colour sketchbook pages.
.jpg)
Stamp the remaining paint on any stamps on to the page.
.jpg)
Use any left over paint on other stamps to add to the textures to the page
.jpg)
The background is ready for further work.
Subscribe to:
Posts (Atom)