Tuesday, 6 August 2013

Finishing those UFO's

I have a short attention span.  I have learnt to start a project and finish to the end in one go rather than coming back to it.  I just find I lose interest in a project when I put it to the side to come back to.  A few years ago I went through all my UFO's (un-finished objects)  And either forced myself to finish them or I gave them away to charity (hopefully for someone else to finish)  or I cut them up to make into something new.  This process was very scary but also very liberating for me.  I now have no fear of just moving on from art pieces that just aren't working.


I somehow have got a pile of UFO's again.  I think it is because painting is so much easier to do in a day that quilting and with all our sickness in our house, moving and other challenges with my health, getting back to quilting has been very challenging.  My goal this week is to finish some of my UFO's.  I have 7 art quilts and 7 journal covers/ pouches (I haven't decided what they are going to be yet) so I have a lot to choose from.  I spent some time a couple of weeks ago slashing pieces that weren't working for me to combine at a later date into a contemporary patchwork piece so now I am left with pieces of work I just want to finish.  You never know I might just get that pile down to zero again so I can start some new work.


Saturday, 3 August 2013

Photography this week:

We are very foggy in the Waikato at the moment.  Some days the fog never lifts. I have never liked fog too much, but I am growing to appreciate its beauty.  

It is very interesting taking photos in fog.  It is very eerie and private like the whole world has disappeared for a moment.

Like low light conditions it is challenging to take photos but those challenges are easily overcome using some of the techniques I spoke of last Friday

  1. Try and use a tripod so that if the light is really low the shot can be kept still
  2. Look for as much natural light as possible. Check out in what direction the sun is in the cloud.
  3. Practice using manual settings to create more light without using the flash
  4. Use the sun to your advantage.  
  5. Use a white piece of card angled in the direction of the light to reflect more light into your photo.  (this only works if you can actually see some light)
  6. Look for interesting shadows and shapes to capture.
  7. Try taking the same object in fog,  low light conditions,  sunny conditions and at different times of the day to see how the light changes. 

Here are some photos I captured this morning in foggy Waikato


Thursday, 1 August 2013

Sketchbook this week

I have created 4 pages this week.  
My intention was to create more but school holidays never go to plan. 

My mental philosophy is

Anything that I get done in the studio during the 
holidays is a bonus"

That way I don't get disappointed.   

The following 4 pages are created with acrylic paint, metallic paint, and gold pen.


A photo challenge


There are many challenges on line for taking photographs.  So many it sometimes hard to choose which ones to do. My cousin posted this one on Facebook. So I went and had a wee nosey and it looked very good. It is great to take a challenge because it helps focus us,  pull us in a new direction,  it gets us out of a comfort zone and helps us see differently.

So I am going to try this photography challenge for August.  It looks so interesting and a little challenging.


Check it out at 


Awesome August Photo-A-Day Challenge

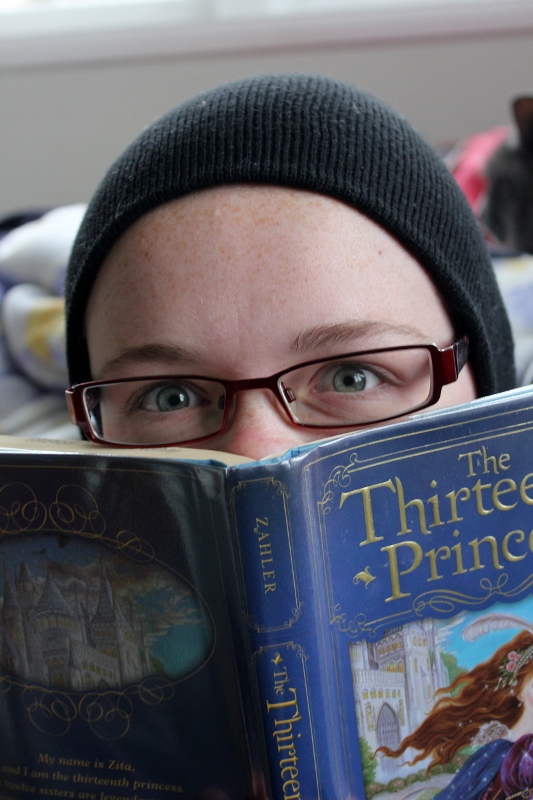
So for today's photo it is a happy self portrait.
I hopefully can pull this one off with 3 sick kids :) I'm exhausted.

Love Catherine xxxxx


Monday, 29 July 2013

From sketch book to quilt

When I work in my sketchbook I use a lot of layers.  Layers give a lot of depth to art work and bring the viewer closer to the art work to study it in more detail.  Paint on paper can be layered until it is quite thick.  On the other hand using paint on fabric is a completely different technique. Because the fabric will be stitched we have to keep the fabric as soft as possible.  This adds quite a bit of challenge to create a similar effect as in my sketchbook but with the flexibility to add stitch once it is dry.  


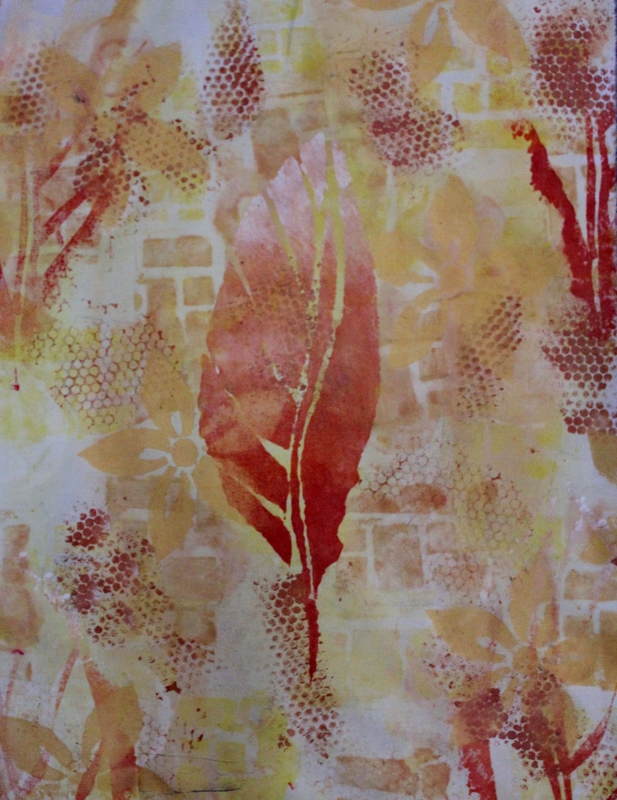
This is one of my layered sketchbook pages for the sketchbook challenge theme "into the woods:


It is created using acrylic paints, metallic paints, stencils and stamps. 
 I have added layer upon layer of paint. 

So I am going to show you how to transfer this idea to fabric.  I am not aiming to get an exact replica of this page but to transfer the feeling and intention from this page to fabric.


1) Mix up the colours of paint (I use a textile ink) needed for this art quilt.  I usually mix the basic colours and then mix the other colours I need as I go.Add a little water to the paint so they will go on thinly.


2)  Wet the fabric you will be working on.


3)  Paint the fabric with the base colours.  Use 3 or more colours to create a very textured base.  I have used white, warm yellow, cool yellow,  orange and a red orange. Keep the paintbrush wet so that the base layer will be very thin.


4) Take off any excess paint with an old towel or rag.  Not only does this help the paint layer to be thin it also blends the paint colours well


5)Place the fabric on to a piece of batting.  This is to assist in getting a good stamping surface. Choose 2 stamps and 2 different colours of paint to print on the surface.  I have used 2 different types of circles in white and orange.


6) Choose another stamp and paint colour.  I have chosen a contrasting square stamp and used a brown yellow to add more texture.  You want to see the stamp but you don't want it to stand out too much.


7)  What the fabric looks like at this stage of the process.


8)  Take the fabric to the ironing board.  Lay an old towel or cloth on the board place your art work on the board then place a pressing cloth on top.  Iron the fabric until dry.  The pressing cloth will help remove any extra paint. 


9)  The fabric once pressed


10)  Add more texture with sequin waste and a stencil brush and a darker paint.


11)  Using a medium sized stencil randomly stencil a design all over the cloth.  I have used a flower designed by me.  The stencil was cut out of an old piece of OHP transparency. I have added gold paint to the brown yellow paint.  Metallic paint used on its own is best left till after the quilting is complete as it is very thick.  But when metallic paint is used with textile ink it is able to be stitched through. 


12)  Stencil a large design in the middle of the cloth. I have used a orange red paint with a little red metallic in it.  Try to vary the paint colour in the stencil to create more interest.


13)  Iron the cloth with a pressing cloth over the top.  Again this will remove any excess paint.  

Now your art top is ready to be quilted.  
Tune in next week for the progress of my wee little quilt xxxx


Saturday, 27 July 2013

Photography this week: Winter

Winter can be difficult to take photos. It can be hard getting enough light especially indoors.  We live in an area where we get  lot of fog too, which also adds to the difficulty of getting enough light.

A few tips that help me to get better photos in winter light conditions

  1. Try and use a tripod so that if the light is really low the shot can be kept still
  2. Look for as much natural light as possible.  I try and take all inside photos next to a window or in brighter rooms
  3. Practice using manual settings to create more light without using the flash
  4. Turn on lights in a room during the day to create more light 
  5. Use a white piece of card angled in the direction of the light to reflect more light into the room

Light from a window. See how it reflects on to his face to create a focal point


The light is from the window again.  He is closer to the light source


I have used the window to get light into his eyes to make the eyes the focal point.  

\

The light source in this room was from 2 points, the window behind her and to the side.


These are the best photos I can get from her at the moment.............The age!!


These were taken through the window.  The light hit the side of the rose hip 


A few moments later the light changed and the rose hip became less defined changing the photo.


Try and look at the light source before you take photos in low light conditions.  With a bit of simple creativity you can capture more light without any expense or challenging set up. 

Thursday, 25 July 2013

Live now

I have woken up today so grateful and thankful for my family.  I am so grateful for my children and hubby.  I feel blessed to have them in my life.  I am grateful to have my mum still present in my life.  She is such a blessing to me and my family.  Her, my dad and my youngest sister are all moving down to Te Awamutu next week.  It willl be so lovely to have them close to me.

Today is my normal sketchbook page day but I felt like breaking slightly from tradition to pay tribute to a friend of mine who passed away yesterday following a battle with cancer.  She is younger than me and has a older teenage son and an 11 year old who was a good friend of my son. She was a wonderful woman so gracious and beautiful.


She was wonderful to work with and a delight to be around.  She and I shared  many times of laughter and love together.  I am so grateful to have known her and to have had a chance to be her friend.  My heart is sad not for her as she is now free from pain but for her family left behind.  I can't even begin to imagine how difficult it must be for them.  My prayers and love go out to them all.


It is at times like these I realise how fragile life is and that we should never live with regrets, lost opportunities,  or forgotten dreams.  We need to create our lives into something worthwhile,
something special and something we can be proud of.  We need to leave a legacy of love to everyone in our lives to carry on for future generations.


Life is meant to be lived and needs to be lived.  We cannot live in what if's, maybes or behind fear of what could come.  We need to live now, in the present and be all we are meant to be.  Just like my friend.  We need to take time to spend with those significant people in our lives and to value what time we have.  God bless xxxxx

Related Posts Plugin for WordPress, Blogger...