Thursday, 31 March 2011

Process of new art work


I have been plodding along with my lime quilt.  I have spent quite a bit of time on it over the past week.  I love the transformation of a piece of white cloth into something beautiful and colourful.

After the crayoning is done it is time to paint.  I use a student grade textile paint.  I would love to use a better paint but trying to get them in NZ is very challenging and very expensive.  We are a bit more limited here with resources as we are are only a small country and a long way from the rest of the world. We have a lot of quilting stores well stock but not so many store to supply surface design.

The paint is too thick in the container so after mixing the colour I always thin it down to a thin yoghurt consistency.  Not too thin as I don't want the paint to bleed into the next area.  The crayon only helps a little to keep the paint on the area. 

I first mix up a range of colours.  The colours used are the same as the pencils and crayons I have chosen.  I use a porcelain palette.  Because it cleans up beautifully.  When painting I use a different paintbrush for each colour.  This save the risks of accidental mixing colour as textile paint is hard to get off.  Speaking from alot of experience. :)  I sometimes do all of one colour first and other times when I need to blend I work with a range of colours at a time.


This is the centre of my quilt finished.  I have gradiated the background of the segments to give the piece more contrast and interest.


The only colour I wasn't sure of was the orange.  I have decided to leave it and put oil sticks over it if it doesn't work once I have quilted it.

Now for the next exciting bit.  Quilting!

Tuesday, 29 March 2011

quilt challenge-52 cards in a year

Week 44

The next 4 cards are based on some of the techniques and designs of Beryl Taylor, an English fabric artist. Her work is very creative and explores a lot of different ideas and techniques.


Today's card is made from corrugated card,  wool,  cotton fabrics, paper, beads, a brass ring, embroidery thread and  a variety of other threads.


The Piece was put together using double sided interfacing and then stitched.


A close up of the work.

Skechbook challenge: 7 days of drawing

Entry for March 22nd
Spilling over : Squares

Entry for March 23rd
Spilling over: scent of roses


Entry for March 24th
Spilling over: Circle designs


Entry for March 25th
Spilling over: Sticks


Entry for March 26th
Spilling over: Technology


Entry for March 27th
Spilling over: Spillimg over of words


Entry for 28th March
Spilling over: Patterns

Friday, 25 March 2011

Quilting sketchbook

I have been asked by a few people to show how I work in my sketchbook.  So my first blog today is to talk about the tools I use and how to set up space for yourself.

I have kept to mainly one medium so far in my sketchbook journey.  I use pen and water colours. These are the basic tools I use....

  • A good quality bought or homemade sketchbook.  Buy the best you can afford.
  • A pencil
  • An eraser
  • A craft knife
  • A ruler
  • A small plastic container with a screw top lid on for water
  • A good quality water based pen
  • Watercolour paints
  • A selection of good paintbrushes
  • a container to store everything in prefably one that you can pick up and take with you.
  • Still life objects, photos and copyright free pictures and life around you.
  • A good imagination -not compulsory but helpful :)

My tools


I am fortunate to have my own studio (if I repeat "There is nothing wrong with children sharing bedrooms" a few times a day  there is no guilt attached to my space :) 

My studio space

 
But if you cannot do that in your home consider finding a small table somewhere, a shelf in a cupboard (even in the kitchen would be fine) that you can call your own.  Store all you bits and pieces there in one place. Before I had a studio space I used to work out of a box on a table. With a little moving around most people can find a shelf for their sketchbook and small pile of tools.  A little space can also give you a sense of having something that is your own and it values the work that you do.


Making time is another space that needs setting up. Work out how time works for you.  Do you need a chunk of time or could you do the page with little bits of time.  I often have to work with bits of time because of my hectic schedule.  I might do 5 minutes at breakfast, a few lines on the toilet, 5 minutes during kids programmes in the afternoon, while waiting for my children after school or while the kids are swimming.  Be creative with your time.  Most people can find a few minutes here and there to draw but find it much harder to find an hour.  If after thinking through your day you still can't find some time it could be helpful to do a time diary for a week to see if you can rearrange some time for yourself.

By making you space and time a priority you are saying to others in your home I am important and my needs are important. 


Skechbook challenge: 7 days of drawing

Entry for March 15th
Spilling over: Water drops off an orange

Entry for March 16th
Spilling over: Summer into autumn

Entry for March the 17th
Spilling over: Ideas for handbags

Entry for March 18th
Spilling over: Peacock feathers out of my vase

Entry for March 19th
Spilling over: Spilling out of beauty inside

Entry for March 20th
Spilling over: Circles/bubbles

Entry for March 21st
Spilling over: Our young

P.S These are late being posted as Server has been down for a few days!!!! 

Monday, 21 March 2011

quilt challenge-52 cards in a year

Week 43

The next 5 cards are based on some of the techniques and designs of Beryl Taylor, an English fabric artist. Her work is very creative and explores a lot of different ideas and techniques.

Today's card is made from corrugated card, paua mounted on wood, beads, wool, sequins, cotton fabrics, paper, organza, buttons and thread.


I attached the materials and card together with double sided interfacing.  The  pocket in the middle is a lot of threads caught in a bag of organza.  I love the little bag idea and would really like to explore this further.


Thursday, 17 March 2011

Process of new work

On the 15th February I began to show you the process I use to complete a piece of art work.  The first part of this is below.

http://catherineparkinson.blogspot.com/2011/02/process-of-new-qrt-work.html

After making the draft I like to get all the pencils and crayons I have and see what colours I have in the range I need.  I choose the colours that will work and line them all up in order from lightest to darkest.


After my colour selections are made I cut a piece of fabric about 3 inches larger than I want the finished piece to be.  I do this so that I can paint perfectly matching bindings. The fabric I use is close weave, pure cotton fabric which I wash so all the fabric sizing is removed.  This means the fabric will now accept the paint onto it and it will set better and not wash out.

 I then lay the fabric out a using a light coloured crayon or a pencil I place the outline of the drawing on the fabric. In this case the large circle and segments.  I then crayon(using good quality high pigment crayons) the out lines of all the major shapes.


I add some detail but not all of it as I will use the quilting to give more detail to the work later.  Once all the crayon is on the cloth I begin to add paint to the material. 

I will show you how I do this next week.


Wednesday, 16 March 2011

quilt challenge-52 cards in a year

Week 42

The next 6 cards are based on some of the techniques and designs of Beryl Taylor, an English fabric artist. Her work is very creative and explores a lot of different ideas and techniques.   I have made this pieces out of material, paper,  a old table mat,  beads, and a paper clay motif rubbed in gold a turquoise ink.


I have used double sided interfacing to attach all the pieces together.  I hand stitched the the paper onto the card.  The paper clay motif was attached with beads.


The clay pattern was made with a stamp pressed into the clay while it was wet and then I left it to dry according to the instructions on the packaging.  Once it was dry I rubbed Turquoise and gold ink over the face of the clay.

Tuesday, 15 March 2011

Skechbook challenge: 7 days of drawing

Entry for March 8th
Spilling over: precious blessings

Entry for March 9th
Spilling over: Paint

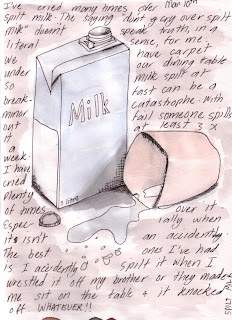
Entry for March 10th
Spilling over:Don't cry over spilt milk


Entry for March 11th
Spilling over: Imagination
Entry for March 12th
Spilling over: Kids in the boat


Entry for March 13th
Spilling over: Schedules and kids artwork in my diary

Entry for March 14th
Spilling over: Music


Seeing with new eyes

I have been drawing for many years but after doing the sketchbook challenge for the last few months I am seeing with new all seeing eyes.    When I started at the beginning of the year I saw far more flat and only drew in the perspective I felt comfortable in working in,  usually flat and face on.  After drawing each day fro this time I am noticing an improvement in how I draw and I am challenging myself to draw in more perspectives.  My eyes are seeing more shadows and shape and I am beginning to put those ideas down on paper. 

I had the privilege to attend a 4 hour drawing class this week and gain a few more skills in drawing.  I really enjoyed the class and I came away with more knowledge on how to draw objects that are fore shortened (or coming towards me)   and to see even more with these eyes of mine. These are 2 of the finished pieces I did.


The picture is drawn with pen and the shading was added with charcoal and chalk pastel. 


This was drawn in the same medium as the picture above.

One new skill I learnt was to draw the outline of the collection of objects, then to fill in all the negative space (the space left between all the objects)  After that was done the details could then be drawn.  I found this very hard as I have always started by drawing individual objects and the the details.   Drawing this way made me look at the space around objects differently and to understand the relationship between the objects better. 

Give it a go and see if you can do it. 
  1. Grab a few objects personal to you
  2. Group them together in a nice arrangement
  3. Draw the outline of all the objects in pen.  (makes you commit to the drawing.  If you make a mistake just redraw the line)
  4. Draw in all the negative space
  5. Add the details with the pen
  6. Shade with charcoal,  graphite or pastel.  Just use black to start with.  Remember to look closely at how the light and dark play together. 
  7. Use an eraser to rub out areas charcoal to give highlights to the picture
  8. Spray with a fixative to stop the charcoal going everywhere.  Try hairspray or a artist fixative.
  9. Keep practicing.

Apology

An apology is needed for you my readers. 
I am sorry for my spasmodic posts over the last few weeks. 
My computer on dial up would not load any pictures.  :( thanks to a little too much internet use.

I have a few back logged posts give to you. 
 I hope today things will be back to normal. 

My next job is to restrict and reinforce (yet again) Internet usage or maybe with the university student back at school (one less person using the net) things may just improve on it's own  HMMMM....We will see :)

Thursday, 10 March 2011

Quilt challenge-52 cards in a year

Week 41

The next 7 cards are based on some of the techniques and designs of Beryl Taylor, an English fabric artist. Her work is very creative and explores a lot of different ideas and techniques.


This card is made from a upolstery sample material.  The piece in the middle is a wrapped buckle.  I have wrapped wool and gold thread around it.  I have hand couched the silk to the background fabric and embroidered on the materials.


I was inspired by water and liquid and the colours of the beach.


Tuesday, 8 March 2011

Quilt challenge-52 cards in a year

Week 40

The next 8 cards are based on some of the techniques and designs of Beryl Taylor, an English fabric artist. Her work is very creative and explores a lot of different ideas and techniques. 


This card incorporated gold paper like in card 39 and a little embroidery.  The paua in the centre of the card has been attached with gold thread.


The papers and materials have been attached with double sided interfacing and metallic threads.   I tried quite a few layouts on this card and finally settle on this one because it balanced and gave the strongest layout.


Monday, 7 March 2011

Skechbook challenge: 7 days of drawing

Tittle page for March
Spilling over


Entry for March 2nd
Spilling over: Life


Entry for March 3rd
Spilling over: Overlapping me


Entry for March 4th
Spilling over: Water dripping down a pane

Entry for March 5th
Spilling over: Vegetables:harvest


Entry for March 6th
Spilling over: Overflowing spirit

Entry for March 7th
Spilling over: A tear


Related Posts Plugin for WordPress, Blogger...